
Cultivation & Growth Guides
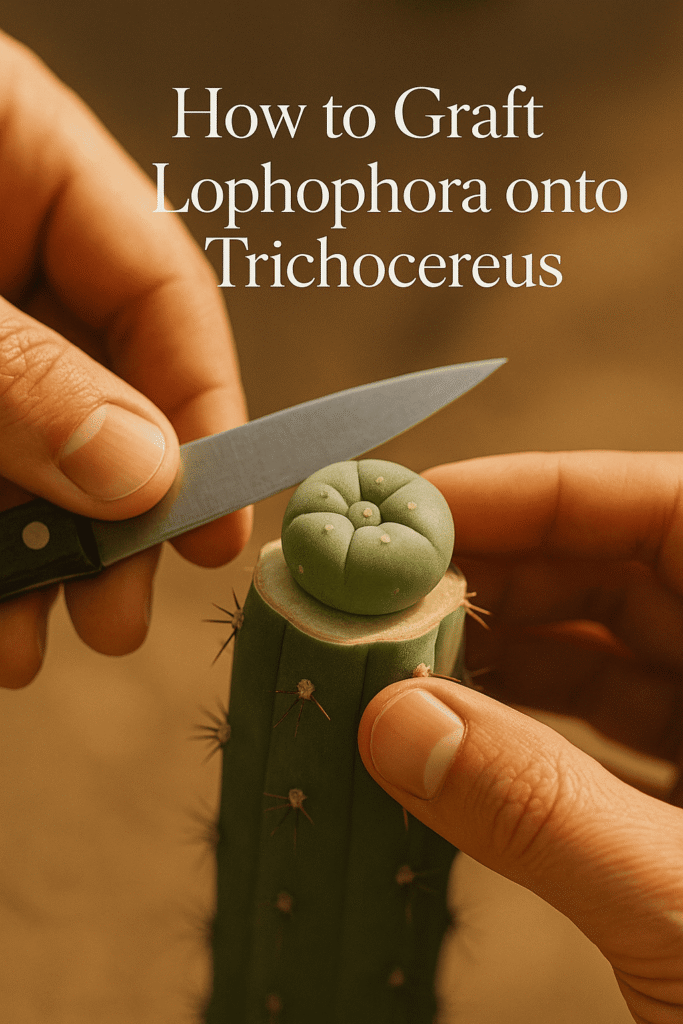
How to Graft Lophophora onto Trichocereus – Step-by-Step Guide
Oct
Grafting Lophophora (peyote) onto a Trichocereus rootstock is one of the most effective ways to accelerate growth, strengthen weak seedlings, and improve long-term survival.
The process may look advanced, but with clean tools, precision, and patience, anyone can perform a successful graft.
At Peyote Seeds Farm, we support growers with healthy rootstocks, authentic peyote seedlings, and sterile accessories to ensure the best grafting results.
🌱 Why Graft Peyote onto Trichocereus?
-
⚡ Faster Growth: Peyote grafted onto a fast-growing Trichocereus can develop 5× faster.
-
💪 Disease Resistance: Trichocereus roots are hardier and more tolerant to over-watering.
-
🔁 Reproduction: Grafted peyote buttons produce pups more easily.
-
🧬 Preservation: Ideal for saving small or damaged seedlings.
🧰 What You’ll Need
Gather your tools before starting:
-
Sterile grafting knife or razor blade
-
Isopropyl alcohol for sterilising blades
-
Rubber bands or grafting tape
-
Trichocereus stock plant (e.g., Trichocereus pachanoi or bridgesii)
-
Lophophora scion (seedling or small button)
🪴 Browse our Grafting Plants and Cactus Accessories & Tools collections for recommended supplies.
🌵 Step-by-Step Grafting Instructions
Step 1 – Prepare the Rootstock
Select a healthy, rooted Trichocereus about 3–5 cm thick.
Cut horizontally across the top using a sterilised blade, ensuring a clean, flat surface.
Step 2 – Prepare the Scion (Peyote Top)
Cut a small peyote button or seedling top with a single, smooth slice.
Ensure the base is fresh, green, and slightly moist — not calloused.
Step 3 – Align the Vascular Rings
Place the peyote scion directly on top of the Trichocereus cut surface, slightly offsetting the vascular rings (the small darker circles) so that they overlap partially.
Proper alignment ensures nutrient flow between both plants.
Step 4 – Secure the Graft
Hold the graft firmly in place using rubber bands or grafting tape stretched across the pot.
Maintain moderate pressure — enough to keep contact, but not so much that it squeezes the tissue.
Step 5 – Healing and Aftercare
Keep the graft in bright, indirect light at 25–30 °C for 7–10 days.
Do not water during this period.
After 2 weeks, remove the bands and gradually expose the plant to more light.
☀️ Post-Graft Care Tips
-
Keep the soil dry for the first month.
-
After successful healing, water lightly and resume normal cactus care.
-
Do not fertilise for the first 8 weeks.
-
If either section shows signs of rot, recut and retry immediately.
Need more aftercare info?
Read: How to Prevent Root Rot in Lophophora
🦠 Common Grafting Mistakes
| Mistake | Problem | Fix |
|---|---|---|
| Misaligned rings | Graft fails to connect | Realign and retry |
| Dirty tools | Bacterial rot | Always sterilise blades |
| Too much pressure | Tissue damage | Use gentle tension |
| Overwatering too early | Rot | Wait at least 10 days before watering |
❓ Frequently Asked Questions
1. What’s the best time to graft peyote?
Spring or early summer, when both cacti are actively growing and sap flow is high.
2. How long until grafted peyote shows growth?
Usually within 3–6 weeks, depending on temperature and humidity.
3. Can I graft Lophophora onto other cactus types?
Yes, but Trichocereus species give the highest success rate and fastest growth.
4. Will the graft affect peyote’s appearance?
Only slightly — the scion keeps its natural form, but grows faster and larger.
